The video embedded below shows how to download Kaltura Capture on Windows and create a recording. The text below explains how to create a recording; if necessary, read the instructions to download Kaltura Capture as well.
- Log into Canvas.
- Click Account in the global navigation on the left.
- Select My Media.
- If this is your first time using Kaltura within Canvas, you will need to click Authorize.
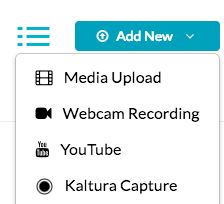
- Click Add New on the top right.
- Choose Kaltura Capture.

- If this is your first time using Kaltura Capture, the program will need to be downloaded. Refer to the Kaltura: Install Kaltura Capture KnowledgeBase article.
- After the installation, nothing happens which is disconcerting. Go back out to My Media and launch it again to use it.
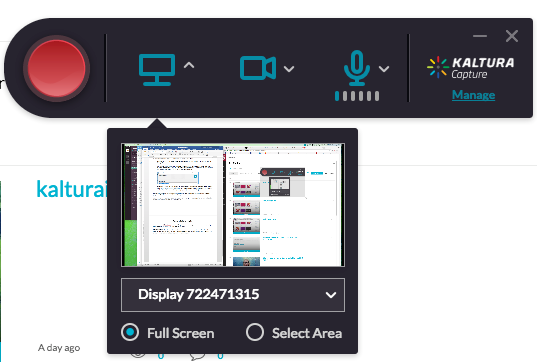
- Ensure you are recording the correct input. Kaltura Capture can record your screen and webcam together. In the finished video, students can choose what to look at. If you have multiple screens/monitors, click the computer icon to choose the correct display.

To turn off the webcam or screen, click on it so it turns grey with a line through it. In the screenshot below, the screen would be recorded and the webcam is turned off.

NOTE: The webcam preview is not visible while recording. In other words, you do not see yourself while recording. Sometimes people don't realize they've recorded their webcam until they review the recording afterward. There is no way to delete the webcam recording.
TIP: Do a test recording of a few seconds to ensure that the correct inputs are recorded and your audio is adequate. - Check your microphone. You should see lines moving below the microphone icon. Click the dropdown to choose a different microphone if necessary.
- When ready, click the red record button.
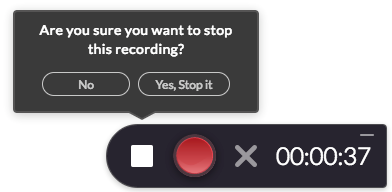
TIP: Make sure the recording toolbar is not visible on your screen, since it will become part of the recording which is distracting to viewers. You may need to minimize it or relocate it to a second screen. - When done, click the white stop button.
- You will be asked if you are sure you want to stop the recording. Click Yes, Stop it to confirm.

- Once created, the video can be previewed in the Kaltura library. In the library, you can:
- Rename the file.
- Delete the file.
- Save and Upload to the My Media repository.
- Save it to the Kaltura Library for further review or uploading at a later time - for instance, if you do not have internet, it will remain in the Kaltura Library.
- If you choose Save and Upload, the next screen will show the progress of your upload. The blue link may not work. To view the video, go to your My Media account or select the link to you My Media account when the uploading process popup appears.

- NOTE: It may take several minutes for the video to process and appear in your My Media account. A camera icon will show in the thumbnail while the video is processing. If the page does not refresh with an accurate thumbnail, click on the video to view it as a new page.
- Share your recording - here are instructions.