These instructions cover plan changes with no program change. If you are changing the student’s primary major from one college to another (Education to A&S, for instance) follow these instructions for changing a student’s program and plan.
Certificates can be added ONLY for students on 2015 or later catalog.
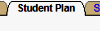
Changing a Plan
- Navigate to Records and Enrollment
- Click Career and Program Information
- Click Student Program/Plan
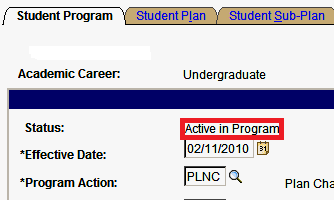
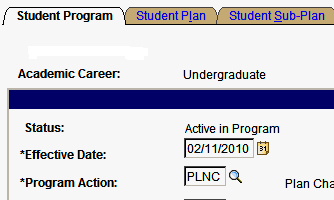
- Make sure the student is currently enrolled before making changes. Status should read Active in Program.
- Click the Include History button (at the bottom). If you forget to click Include History, the plan change will not work.
The student’s active program/plan will be displayed.
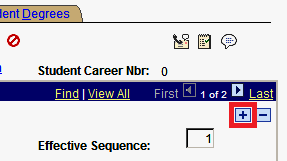
- Click the + button to create a copy of the student’s current program. The effective date will be today's date.
You cannot make changes to layers with an effective date in the past.
- Type PLNC into the Program Action field.
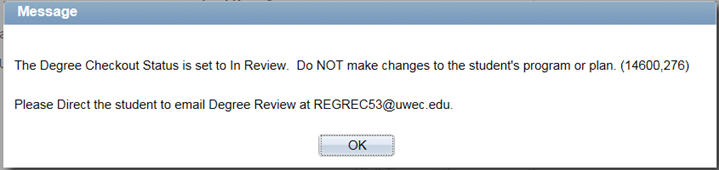
NOTE: If the student has been reviewed for graduation you will get an error message. If you get this message, email degreereview@uwec.edu to make the change.
- Click the Student Plan tab
 .
.
Student program information copied from the Student Program is found at the top of the page. Plan information is found at the bottom of the page.
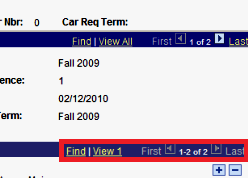
- Use the arrows on the second blue line to scroll through plans or click View All.
-
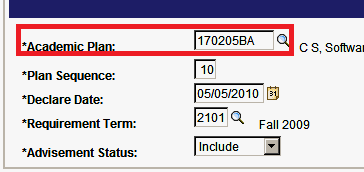
Type over the academic plan code with the new code. Plan Sequence will automatically update the Declare Date.
Adding a New Plan
- If you haven't already done so, follow steps 1-7 above to create a layer that you can update.
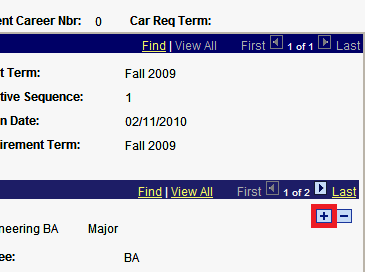
- Click the + button in the middle of the Student Plan tab.
You will see a new plan row with no plan code, and with today’s date as the declared date.
- Enter the new plan code.
NOTES:
If you are not sure of the exact code, enter a few digits and click the magnifying glass. It will give you a list of options starting with those digits. Click on the correct plan code.
It is important that you select a post-bac code if the student already has a degree.
If you don’t see the code you are expecting, verify that the student is in the correct program (College) and that you have the correct plan code.
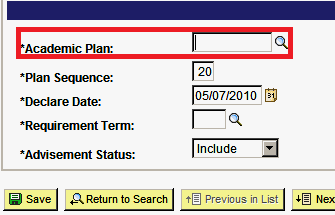
- Adjust the Plan Sequence so that the primary major is 10, the second major is 20, minors and certificates are 30 and pre-professional plans are 40.
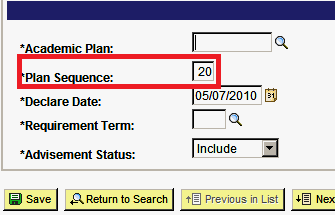
NOTE: When the Requirement Term is different from Admit term and a new plan is added, PS defaults to the admit term as requirement term for the new plan. Check to make sure that the new plan has a correct requirement term matching the requirement term on the Student Program tab.
- (Optional) If you need to add another plan, click the + button to create another blank academic plan.
NOTE: PeopleSoft sorts plans in numerical order. You do not need to worry about loading plans in correct order. The plan sequence number insures the plans will be reviewed in the proper order.
- Click Save.